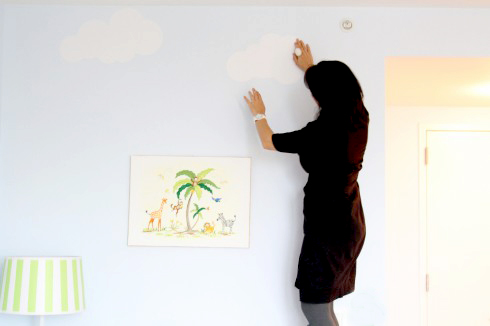
I was contacted to finish decorating a nursery that had already been furnished and painted blue. It had artwork spread throughout the room, shelves filled with toys and books (all organized!), but my clients felt that it was still incomplete. And they were right. So my mission, add a few something somethings (economically) to make it feel warm, cozy, and so the blue walls didn’t smack them in the face when they walk into the room.

FIRST STEP: Fix what was currently “off”.
* the artwork looked too scattered, and un-cohesive
*furniture too close to the wall
SECOND STEP: Add items to balance the room + “tame” the blue walls
* added tree decal with monkeys (client – baby Jacob loves Curious George, so I added adorable monkeys) to give visual height to dark furniture and distract from the
* add clouds (same reason above, balance the top with the bottom)
* add soft FUN pillows (to the plain loveseat)
* add artwork that POP with color (tame the blue walls!)
* add 3D butterflies (visual POP of color!)
Below’s a highlight of all the items we added. One of my design ideas in saving money was buying 1 huge decal with a tree, monkeys, and leaves and spreading the design throughout the room (NOT JUST IN ONE WALL) bec other walls wanna party too! I had the tree branches extend to the ceiling, and adjacent walls, I even placed some leaves on the radiator, and on a light switch. I also “trimmed” a branch from the tree decal and added it to the bookshelves – for a dab of ADORABLENESS!


The palm tree artpieces were scattered, so we aligned them for a sleek look. In a room that already has lots of toys scattered, it is MEGA IMPORTANT to have artwork feel more calm and not add more visual clutterness … hence the straight line mounting of the artwork .. plus .. the artwork mounted side by side ‘tell a story’. Do we want story telling in a nursery room. Heck yeaaaahh!


The blue chair that my client has in the room seemed to disappear against the blue walls, so we added an oooh sooo cute pillow of a little boy holding a truck. Did you see how the yellow/blonde hair of the boy matched the yellow color of the LOVE art … yep, all ‘designed that way’ my friends!
I ordered 3D butterflies for adorable Jacob (cutest baby client ever!) for the bathroom wall/door that you immediately see when you enter the room to give it a sprinkle of visual FUN. The playful set of butterflies arrived and were ready to flutter onto the walls (3D wall art awesomeness!). 3D butterflies arrive with adhesive dots on the back so all you have to do is remove the adhesive protective film and place the cute butterfly on the wall (door, shelf, lamp, desk, window frame, mirror, someone’s back hehehehe). Oh, did I mention how economical they are? Wall art DOES NOT have to come in a frame, wink! Here are close up photos of the butterflies.


On the entry door of Jacob’s room, I also added a fabric giraffe height chart with cute photo frames (so Jacob’s growth is awesomely documented).

I applied one of the decal branches next to my client’s current shelf so the branch looks like it is growing from the shelf. Can you spot the sleeping monkey below (NO .. not me!!):

Here’s the adorable sleeping monkey:


Here I am below – on the ladder attaching the decal transfer paper. A big THANK YOU to my wonderful assistant, Emily, who helped me install these decals. Did you see the monkey’s stuffed doll? – a bunny. The bunny normally comes in blue, but since my client has blue walls, I suggested a color that would make the adorable bunny. You did see the monkey’s pacifier right??!
