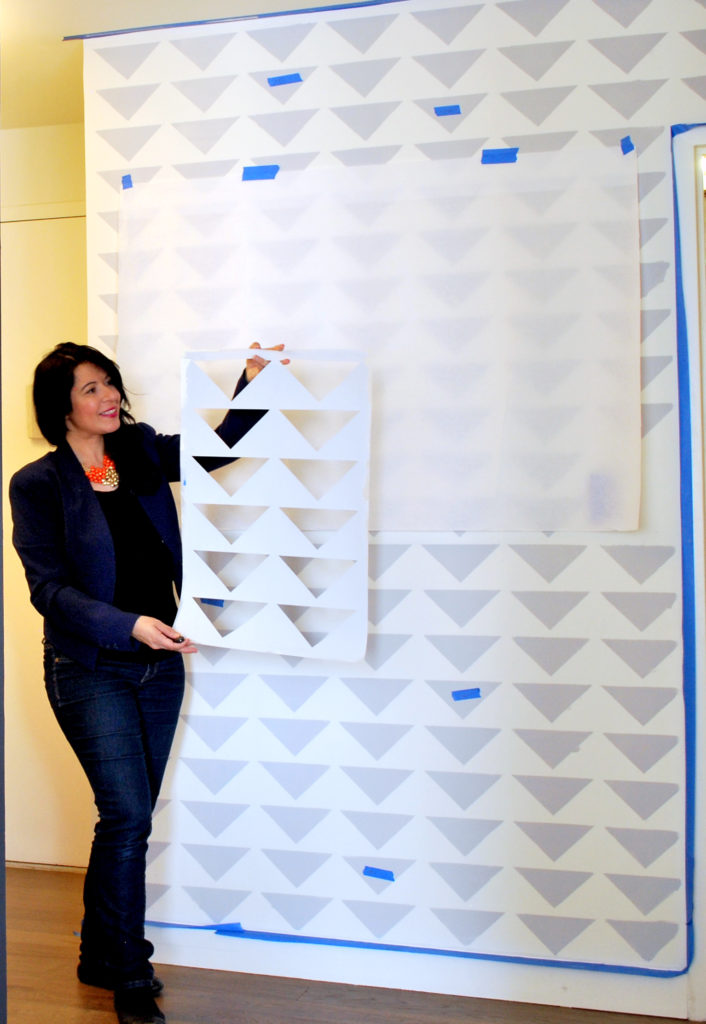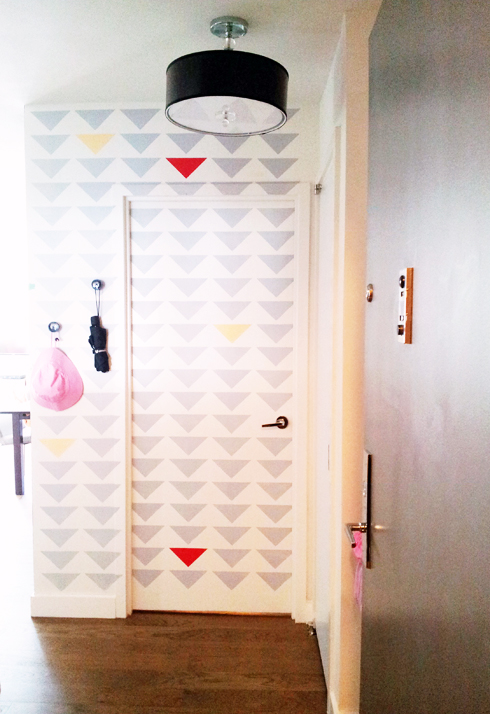

It’s that time again – time to take you onsite with me to one of my interior design projects, to the behind the scenes of the design steps that we implemented in a foyer – for my cool clients Stephanie and Bill and their daughter Kathryn. They wanted the entrance to make a statement (a cool, hip, unique, fun, with a dash of elegance type of statement!). Wall paper is great for statement walls, however, they can also be expensive. So the alternative that I recommended was: stenciling the walls! We used a fun triangle design stencil painted in a soothing gray (with sprinkles of color – see photos below). Here’s my design game plan for an elegant foyer . . . .

Besides the stenciled wall we added:
1. new ceiling light fixture with a black shade
2. mail holder
3. cute BIRD hook for Kathryn (child height)
4. adorable BUTTON hooks for the adults
5. gorgeous mirror
6. beautiful half-moon (semi-circle) bench
7. magnetic paint on 1 wall
8. a map decal (that had me wrestling it)
9. painted some stenciled triangles with POP of colorful paint

We added sprinkles (no, not the eating kind!) to the stencil. I presented the stenciled decorative wall design as a 2 PART DESIGN FOR THE WALL:
Part (1) paint the stencil (triangle design) is a soft gray wall color
Part (2) add sprinkles of color (from sample paint … super economical like $4.95 a jar) for even more visual coolness. Below I am labeling which triangle to paint and in what color for the contractor / client.


WALL GALLERY
I believe that the most precious element in a photo gallery are the memories, it’s what brings us BACK to that day in the photo. Which is why I usually advice to save money by ditching any plans to get expensive frames. Creating a photo gallery wall can be a little tricky … shall we have the frames scattered or streamlined? … 2 rows or 3 rows? … will it look too empty?. Below is my way of finalizing the “look” that we want.

HOW TO CREATE A PHOTO GALLERY DESIGN (that you won’t regret)
- Place each frames that you wish to use onto a large paper (like this paper which is about $6.00 for 75″ roll)
- Outline with a pen the frames onto the paper to make ‘paper frames’
- Cut the ‘paper frames’ to represent the real frames
- Tape the ‘paper frames’ to the wall in a placement that you love. Play around with the placement to see which one (1) you love the best and (2) has the best flow with the items (and wall) around the frames.


See the SPRINKLES (of color):
Once I knew they had a toddler, adorable Kathryn, I knew I wanted to add toddler height hooks so Kathryn can hang her coat and bags.
MISSION ACCOMPLISHED! We replaced the blah/boring ceiling light fixture with a black colored shade pendant one. I love the shade – it’s the perfect welcoming beacon for when the front door is opened. Finding it was def one of ‘those’ moments, ya know, the …. clouds part as I spot it …. knowing it’s absolutely perfect for the space”. Glad they thought so too
