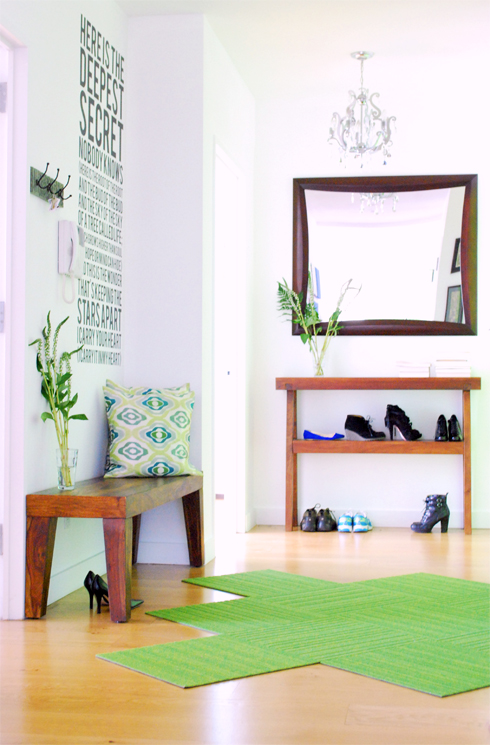
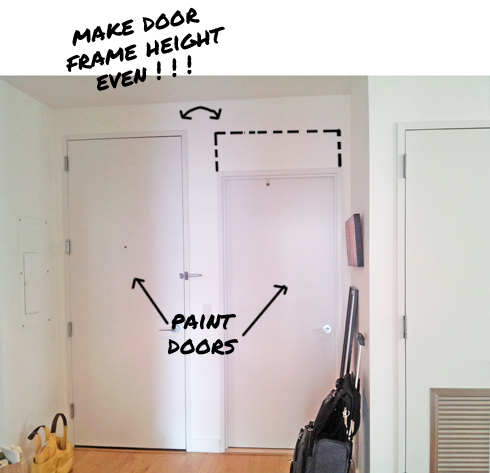
Here’s the behind the scenes of the entryway that I designed for my adorable clients Shruti and Gaurav. The design plan – upgrade the entryway to feel welcoming and hip. They were NOT afraid of color so I was able to brighten up their entryway with one of their favorite color – a gorgeous green. You will get to see (1) the before photos of the entryway, (2) their keep list (just two items), (3) the beautiful poem wall decal that I installed (yep, me on a ladder yet again!), and (4) the open shoe storage solution (psst, its a gorgeous slim console table that matched a bench that the clients already had!)

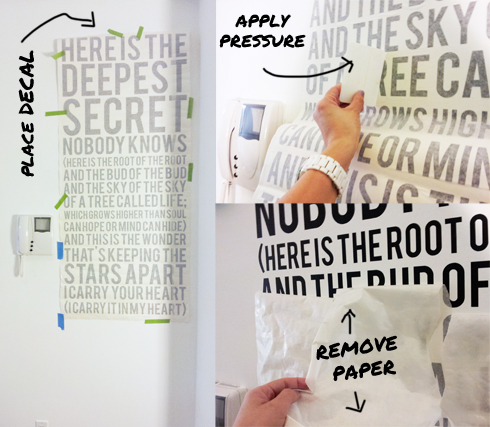
We replaced the original busy mirror with a wall decal, but not just ANY WALL DECAL. One with a poetic flair. Clients picked out the poem that resonated with them the most and I installed it for them.


THE TO DO LIST FOR THIS ENTRYWAY
- paint doors (green!!)
- add wall decal
- add carpet tiles
- add SLIM console table for shoes and mail
- add key hook
- relocate mirror (from guest room)
- relocate chandelier (from dining room)
- add 13 small art frames by green doors
- make clients smile with the design
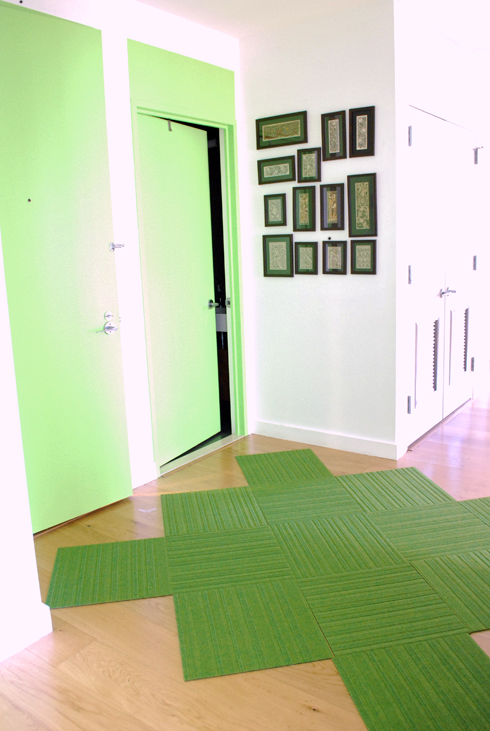
There was 1 door in their hallway that was oddly shorter than EVERY OTHER DOOR. My fix? Paint it to match the height of the adjacent door, so 2 doors received a fresh color of green paint. This is how it looked before the paint and afterwards . . . .
THE KEEP LIST:
- bench (perfect to sit down to remove shoes, plus gorgeous)
- two pillows (perfect way to soften a hard furniture – wood bench)
RELOCATED:
A great way to save money on items for a space is to SHOP WITHIN your home. which is exactly what we did in this for Shruti & Gaurav.
- chandelier – was originally in their dining room, but it was TOO small for their long dining table. New home = entryway!
- brown frame mirror – was originally in one of their guest rooms above a dresser, but it didn’t serve much purpose since there was a floor mirror in the room. New home = entryway!

One of my pet peeves in design is seeing doors that are NOT the same height. It irks me soooo much! So, my design plan included giving the ILLUSION of having the doors the same height without reconstruction. Say what? How? WITH PAINT! And not just any dull paint, we went for a gorgeous GREEN color that complimented their favorite pillows and the carpet tiles that we planned to install. Check out how it looks now:


DECALS STEPS:
(1) decide on final placement … (2) apply pressure … (3) remove backer paper


Another WOW factor was replacing their runner with carpet tiles. The design makes the space feel larger/wider vs narrow using the runner. Below is my drawing to the contractor instructing him on where/how to attach the floor square carpet tiles.

OKAY, HERE’s MY ENTRYWAY DESIGN RECIPE (no calories!)
(4 THINGS TO HAVE IN YOUR ENTRYWAY)
- add art (maybe even a decal) or photo frames to make the space more ‘personable’ to you!
- add a rug (commercial grade is best for durability) to soften wood floors and ground the open space
- add tushy comfort – seating where you can remove shoes
- add a drop zone for keys – for accessibility (no more losing keys around the home)